Published on October 8th, 2022
Last updated on January 25th, 2023
How To Dip Dye Hair At Home? 3 Steps

Beautiful hair color is essential for the look many girls try to achieve. However, the beauty of hair depends on several factors at once, such as the right hairstyle and hair care, the suitable dip dye, and the overall health of your hair. Properly observing all these four aspects, you can achieve a stunning effect on your hair.
In general, for dip dyeing, it is enough to choose the right dye, prepare the hair and the work area, and follow the instructions on the package. After that, you need to dry your hair and enjoy the new color properly.
This article will be devoted to how to properly dye the tips of hair by dipping it into the dye pot. This method is slightly different from classic hair coloring and may cause some difficulties for girls.
So, buy hair dye, but do not rush to open it until you have read this article.
What Is Dip Dyeing?

Have you ever seen someone with half of their hair a different color than the other half and wondered how they got that look? The process is called dip dyeing, a popular way to add color to your hair without committing to a new hue. Keep reading to learn everything you need about dip dyeing your hair.
Dip dye hair is achieved by bleaching only the ends of your hair and then dying them a new color. This ombre effect is a popular way to add some fun colors to your hair. Plus, it’s low maintenance since the roots will grow out gradually and won’t require frequent touch-ups.
If you’re thinking about dip dyeing your hair, there are a few things you should keep in mind:
- First, bleaching your hair can be damaging, so if your locks are already dry or damaged, this may not be the best option;
- It’s also essential to choose a quality bleach and dye so that your hair stays healthy and vibrant;
- And finally, be sure to consult with a professional stylist before making any significant changes to your hair.
Whether you’re looking for a fun way to switch up your look or want to add some dimension to your hair, dip dyeing may be the perfect solution for you. But remember, before making any major adjustments, always seek the advice of a qualified stylist. And to keep your hair looking healthy and vibrant, use high-quality products.
How To Dip Dye Your Hair?

If you’ve decided that dyed ends of the hair are what you need, then your next step is choosing the right color. When picking out your shade, it’s essential to consider both the natural color of your hair and the undertone. For example, if you have warm undertones in your skin, you’ll want to steer clear of cool tones like blue or purple in your hair. Not sure what shades will compliment you best? Ask your stylist for recommendations.
Once you’ve chosen your perfect hue, it’s time to start the process. Depending on the length and thickness of your hair, bleaching and dyeing at home can take anywhere from 2-4 hours. If you’re uncomfortable doing it yourself, leave it to the professionals and make an appointment at your local salon. Now we will go through the entire process step-by-step.
1. Choose A Product
The first and crucial point in getting hair ends dyed is the choice of the paint itself. A well-chosen color can compensate for the sloppy effect during the first attempt to dye your hair with a dip. Therefore, devote a lot of time to this aspect and work out your color well.
You can find ready-made patterns on the Internet or choose a color that matches your eyes’ color. You can also select your favorite color even if it doesn’t quite suit your look. In this case, you need not overdo it with the amount of dye on your hair.
After that, buy a hair bleach. If you have dark hair and want to use light dye, you need to remove the natural hair color. However, if your hair color is light, you may not use hair bleach, as the dye will absorb nicely into your hair without it. However, it is necessary to consider the color of the hair with dye in any case to avoid the unwanted mixing of colors. Otherwise, you risk getting the wrong color.
Buy hair dye. Be sure to buy a little more paint than you need, as you don’t know how successful your procedure will be.
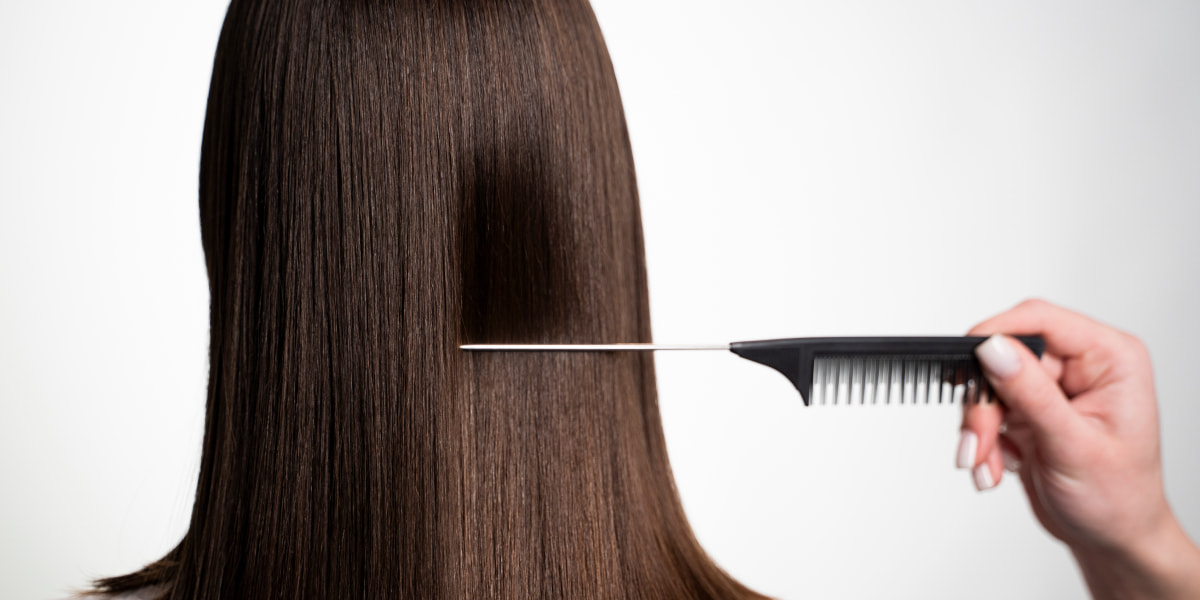
2. Prepare The Hair And Place
Now it’s time to prepare your hair for the procedure and take care of your workspace. You don’t want to mess up the whole house trying to dye your hair. That is why you must think through everything in advance and prepare everything you need for the procedure.
For this:
- Put on an old t-shirt. During the procedure, you will have to loosen your hair, which means that it will fall on your clothes. Make sure that the clothes on you during the procedure are not so dear and valuable to you;
- Prepare all the necessary tools. It is best to do the procedure in the bathroom. Cover the sink with something to prevent the paint from soaking into the surface. Also, ensure that the water supply is working and the mirror is clean;
- Decide which areas of your hair you want to color. The maximum recommended length for dyeing is three-quarters of the length of the hair shaft. Make sure your hair is washed and dry. It is best to dye your hair the form you usually have in everyday life. You also need to part your hair in a natural parting;
- If you need to bleach your hair, do this procedure first.
3. Getting Hair Ends Dyed
Now it’s time to make the procedure of painting your hair.
First, you need to prepare your hair dye. Follow the instructions on the package to avoid mistakes during the procedure and achieve the desired effect. Some paints can be applied directly to the hair; some products must be mixed. Everything will depend on your product.
Then you need to apply the dye to your hair. You can do this in two ways:
- Dip your hair into the dye pot;
- Paint your hair with a brush.
Whatever method you choose, you need to ensure that the hair is entirely in the dye and that you have not missed a hair. Also, as you color, ensure that the hair’s top is less colored than the bottom. This approach will allow you to create a soft color transition.
Then you need to wrap your hair in sections of aluminum foil. This helps the hair to warm up and better absorb the dye. Keep the dye on your hair for as long as it says on the packaging instructions. Be sure to examine the packaging at home before use, and even better, do it in the store.
Now it’s time to wash off all the dye. You can do it with cold water. And to make your hair feel better, be sure to use a hair conditioner.
* Remember that you can’t wash your hair with shampoo, as it will wash off the color!
After you have completed the procedure, you can style your hair and go outside.
What Are The Benefits Of This Method?

There are several advantages to dye tips of hair:
- First, it is a relatively simple and low-maintenance way to add color to your hair. Unlike highlights or all-over colors, you do not need to touch up the roots as often because the color is only on the tips of your hair;
- Second, dip dyeing is a great way to experiment with color without making a big commitment. If you do not like the results, you can wash out the color and start again;
- Third, dip dyeing can give you a natural-looking gradient of color that can be very flattering.
Although there are some positives to dip dyeing your hair, there are also some drawbacks that you should be aware of:
- First, because the color is only applied to the tips of the hair, it can fade quickly – especially if you wash your hair frequently or use heat styling tools often;
- Second, if not done correctly, dip dyeing can result in an unnatural-looking band of color at the roots where the dyed hair meets your natural color;
- Finally, depending on the type of dye used and how light or dark your natural hair color is, dip dyeing can be tricky to get right at home – it may be best left to a professional stylist.
Care Process After The Procedure
It is important to use shampoo and conditioner specifically designed for colored hair. These products will help keep your new hue vibrant and prevent unwanted fading. Avoid any sulfate products, as they can strip away color. Try to limit heat styling as much as possible, as this can damage your hair and color. If you must use heat, use a heat protectant spray beforehand. Lastly, touch up your color every four to six weeks to keep it looking its best.
After taking the plunge and dip-dying your hair, following these simple steps will help ensure that your new hue lasts as long as possible!
Avoid washing your hair for at least 48 hours after dyeing it, use cold water when you eventually wash it and use shampoo and conditioner specifically designed for colored hair. You should also limit heat styling and touch up your color every four to six weeks.
By following these tips, you’ll be able to enjoy your new hue for weeks to come!
Bottom Line
So there you have it – our definitive guide on dip-drying hair at home. I hope you found it helpful! As I mentioned, the key to getting great results is to use high-quality hair dye and to follow the instructions carefully. Other than that, have fun experimenting with different colors and styles!
FAQ
How To Dip Dye Hair At Home?
To do this, you need to gather all the necessary items for the procedure, prepare your work area, buy paint and follow the instructions on the package.
How Much Does It Cost To Do This In The Salon?
On average, such a procedure will cost you about 50-70 dollars per session. However, some salons offer the service for more than $100.
Is Dip Dye Safe?
In general, yes. This can only be dangerous if you have allergic reactions to the ingredients in the hair dye.